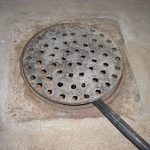
If you’re planning to renovate your bathroom and want to upgrade your shower, it’s important to know the technical details involved. One key factor is determining the right size pipe for your shower drain. This is crucial to ensure your drains work efficiently and prevent any overflowing.
In this article, we’ll provide you with the necessary information on how to install a shower drain, including the correct pipe size for your shower. Whether you’re looking to update your residential or commercial bathroom, we’ve got you covered.
Keep reading to learn more about the essential details for a successful shower drain installation.
Why Installing The Correct Size Shower Drain Is Important
The shower drain size is specified in local plumbing codes and regulations. Installing the correct size pipe for your shower drain is crucial to prevent water from backing up and flooding your bathroom floor. Stand-alone showers have a low threshold for flooding because they do not have high walls. Therefore, it is essential to ensure that the shower drain can handle the flow rate of wastewater efficiently.
Using a smaller pipe size of 1 1/2 inches may lower construction costs, but it will not be sufficient to keep your water flowing efficiently. This can lead to excess water overflowing onto your bathroom floor, causing major problems with your flooring and subflooring. Repairing the damages can be costly, so it is better to spend a little more money on the right size pipe in the first place.
In addition to preventing flooding, installing the correct size shower drain can also ensure the durability of your plumbing system. A smaller pipe size can lead to corrosion and clogging, which can cause further damage to your plumbing system. Therefore, it is important to follow local building codes and regulations to ensure the proper installation of your shower drain.
What is The Standard Size Pipe For Shower Drains?
When installing a shower drain, building codes will usually require a two-inch pipe. This is the standard size pipe for shower drains and pans. A two-inch diameter pipe can handle even shallow trays without overflowing. However, regulations may vary depending on the area or country. Some states in the United States only require a 1 1/2 inch pipe for shower drains. Even if the regulations do not require a two-inch pipe installation, you may still want to use it. Most standard shower pans and trays are already designed to fit a two-inch pipe. PVC pipes are commonly used for shower drain pipes.
Is it Possible to Use a Smaller Drain Pipe?
If your building code doesn’t require you to use a 2-inch drain pipe, it is possible to use a smaller diameter pipe. You can reduce the pipe size by gluing in a reducer to make the opening smaller. However, before you decide to use a smaller drain pipe, you need to consider how much water you have running down the drain.
For example, if you are installing a shower with multiple showerheads, a smaller pipe will struggle to drain the water fast enough. If you are unsure whether you can use a smaller pipe size, it’s best to consult a professional regarding the water flow of your specific shower.
Using a smaller drain pipe can be a cost-effective solution, but it’s important to ensure that it can handle the water flow. If you have a sink in your basement or crawlspace, it’s also important to consider the distance the water needs to travel and whether different size pipes are needed. A smaller drain pipe may not be suitable for underground plumbing or for a garbage disposal or toilet.
What is The Right Pipe Size For Shower And Bath Combinations?
If you’re planning to install a shower and bath combination in your bathroom, you may be wondering what size drain pipe you need. The good news is that you can use a smaller drain pipe for a bathtub with a shower. A one-and-a-half-inch pipe is sufficient to keep the water draining fast enough and not getting too backed up.
It’s important to note that while a shower base is usually independent, the bathtub is not. In a shower, the wastewater is discharged directly into the plumbing system through a trap inside the shower drain. In the bathtub, an outlet is needed similar to a sink.
Consulting a professional plumber is advisable regarding measurements and testing, even if you are doing the installation yourself. They can help ensure that the pipe size is correct and that the installation is done safely and efficiently.
When it comes to installing a shower and bath combination, it’s important to position the shower base properly. It should be level and flush with the surrounding flooring and subflooring. This will help prevent any leaks or damage to the subfloor.
In summary, a one-and-a-half-inch pipe is sufficient for a bathtub with a shower, but consulting a professional plumber is recommended to ensure proper measurements and testing. Proper positioning of the shower base is also crucial to prevent any leaks or damage to the subfloor.
How to Install Different Types of Shower Drains?
1. Solvent-Glued Shower Drain
To install a solvent-glued shower drain, you need access below the shower, such as a crawlspace or unfinished basement. Here are the steps to follow:
- Adjust the drain pipe according to the manufacturer’s instructions, which is usually at the same level as the subfloor.
- Disassemble all parts of the drain and set aside the cardboard friction washer and rubber seal washer.
- Apply a beading of silicone caulk around the flange. Set the upper body of the drain into the drain opening and press down.
- Place the rubber seal gasket and cardboard friction gasket over the male threads of the upper body from below the base of the shower. Thread the lower body to the upper body and tighten.
- Clean away excess silicone and attach the metal grate.
- Spread the plastic pipe primer around the edge of the drainpipe and socket from below the shower base. Then, spread solvent glue on the same surfaces. Slide the drain pipe into the socket and hold until the bond hardens.
Note: Do not use the shower for at least 24 hours to allow the bond and silicone to cure fully.
2. Compression-style Drains
Compression-style drains are easier to install than solvent-glued drains. They can be used with PVC, brass, or ABS pipes and fiberglass, acrylic, or steel shower bases. Here are the steps to follow:
- Trim the drainpipe, which should come up to about 3/4 to 1 inch below the shower drain lip. Test fit the shower base to mark the right height and then remove it to cut the pipe. You can use a hacksaw or a tube cutter to trim the pipe.
- Apply silicone caulk around the top flange on the drain opening. Insert the drain into the opening.
- Put the rubber seal washer first, followed by the cardboard friction washer over the tailpiece of the drain.
- Thread the mounting nut onto the tailpiece and tighten it with pliers.
- Position the shower base so the drainpipe extends up into the assembled drain and insert the compression gasket.
Important: Leave the silicone to cure for at least 24 hours before you use the shower.
3. Tiled Drains
Tiled drains are three-piece units that you install during different phases of the tile pan installation. Here are the steps to follow:
- Install the flange on the bottom into the drain pipe with solvent glue.
- Trowel some mortar around the opening of the drain to create a slope toward the drain and away from the walls.
- Once the mortar has dried, install a waterproof liner over the floor. Ensure that it also covers the lower flange. Seal the liner with silicone caulk and trim any excess liner around the opening.
- Install the middle flange using bolts to secure it to the bottom flange. Pour water over the shower pan to check the liner for leaks.
- Attach the drain strainer so it extends up above the liner. Follow the manufacturer’s instructions regarding the degree of extension for the strainer.
- Install the rest of your ceramic tiles. Ensure grouting and all seals are fully cured before you use the shower.
Conclusion
Choosing the right size of drain pipe for your shower is crucial to avoid any potential issues with water overflow. For most shower installations, a 2-inch pipe is the recommended size to ensure proper drainage. You can also find helpful videos online to guide you through the process.


