If you’ve ever tried to get rid of sticky tile glue from floor, you know it can be a tough and time-consuming task. However, with the right tools and techniques, you can make the process much easier and get your floors looking clean and smooth once again. In this article, I’ll share some simple and effective ways to remove sticky tile glue from floors, so you can get the job done quickly and easily.
Before we dive into the methods for removing sticky tile glue, it’s important to note that the best approach will depend on the type of glue you’re dealing with and the type of flooring you have. For example, some adhesives may require a more aggressive approach, while others can be removed with gentle, natural solvents. Additionally, certain types of flooring may be more delicate and require special care to avoid damage during the removal process.
That said, with a little bit of know-how and some elbow grease, you can remove even the toughest sticky tile glue from your floors. In the following sections, I’ll outline some of the most effective methods for removing tile glue, so you can choose the one that’s right for your situation and get your floors looking like new again.
Tools and Materials Needed
Removing sticky tile glue from the floor can be a tedious task, but having the right tools and materials can make the job much easier. Here are some of the things you will need:
Tools
- Scraper
- Heat gun or hair dryer
- Multi-tool
- Chisel
- Hammer
- Bucket
- Sponge
- Protective gloves and goggles
Materials
- Adhesive remover
- Citrus solvent
- Vinegar
- Water
- Olive oil
- Dishwashing liquid
- Clean rags or paper towels
Having these tools and materials on hand will help you remove sticky tile glue from the floor with ease. Remember to wear protective gloves and goggles to avoid any injuries. Let’s move on to the next step!
Section 1: Removing the Tiles
Subsection 1: Preparing the Area
Before removing the sticky tile glue from the floor, it’s important to prepare the area properly. Start by removing any furniture or items from the area. This will give you enough space to work comfortably without any obstructions.
Next, cover any vents or openings in the room to prevent the dust and debris from spreading to other areas. You can use plastic sheets or drop cloths to cover the vents and openings.
Finally, put on gloves and safety glasses to protect yourself from any sharp edges or debris that may fly around during the tile removal process.
Subsection 2: Removing the Tiles
Now that you have prepared the area, it’s time to remove the tiles. Start by using a heat gun or hair dryer to soften the adhesive beneath the tiles. Hold the heat gun a few inches away from the tile and move it in a circular motion until the adhesive softens.
Next, use a putty knife or scraper to pry the tiles off the floor. Start from the edges and work your way towards the center. Be careful not to damage the floor underneath.
If the tiles are not coming off easily, you can use a chisel or hammer to break them into smaller pieces. This will make it easier to remove them from the floor.
Subsection 3: Cleaning Up the Area
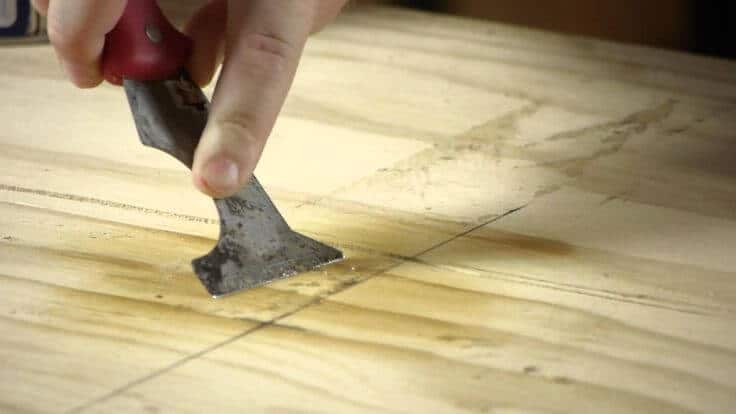
Once you have removed all the tiles, it’s time to clean up the area. Use a scraper or putty knife to remove any remaining adhesive from the floor. You can also use a solvent or adhesive remover to dissolve any stubborn residue.
After removing the adhesive, use a vacuum cleaner to remove any dust or debris from the floor. Finally, wipe the floor with a damp cloth to remove any remaining residue or dirt.
Removing sticky tile glue from the floor may seem like a daunting task, but with the right tools and techniques, it can be done easily and efficiently. By following these simple steps, you can remove the tiles and clean up the area without any hassle.
Removing the Glue
Subsection 1: Preparing the Area
Before starting to remove the sticky tile glue, it is important to prepare the area. First, ensure that the room is well-ventilated by opening windows or using a fan. This will help to prevent inhaling any fumes from the adhesive remover. Next, remove any furniture or objects from the area to make it easier to work. Cover any remaining fixtures with a plastic sheet or drop cloth to protect them from the solvent.
Subsection 2: Applying the Solvent
Once the area is prepared, it’s time to apply the solvent. There are several options for adhesive removers, including citrus solvent, water displacement spray, and store-bought removers. Follow the instructions on the product label for the best results. Generally, the solvent should be applied to the glue and left to sit for a few minutes to allow it to penetrate the adhesive.
Subsection 3: Scraping the Glue
After the solvent has had time to work, it’s time to start scraping the glue. Use a scraper or putty knife to gently scrape away the adhesive. Be careful not to damage the flooring underneath. If the glue is particularly stubborn, it may be necessary to apply more solvent and let it sit for a longer period of time before scraping again.
Subsection 4: Cleaning Up the Area
Once all the glue has been scraped away, it’s time to clean up the area. Use a damp cloth or mop to wipe away any remaining residue. If necessary, use a mild detergent or soap to clean the area. Rinse the area thoroughly with clean water and allow it to dry completely before replacing any furniture or fixtures. Removing sticky tile glue from the floor can be a time-consuming process, but by following these steps, it can be done effectively and efficiently. Remember to take the necessary precautions to protect yourself and the surrounding area, and always follow the instructions on any adhesive remover product labels.
Finishing Up
After successfully removing the sticky tile glue from the floor, it’s time to finish up the job. This involves sanding the floor and applying new flooring. Here are the steps to follow:
Subsection 1: Sanding the Floor
Before applying new flooring, it’s essential to sand the floor to ensure it’s smooth and level. Here are the steps to follow:
- Start by sweeping or vacuuming the floor to remove any dust or debris.
- Use a floor sander to sand the entire floor. Be sure to follow the manufacturer’s instructions and use the appropriate grit sandpaper.
- Once you’ve sanded the floor, use a shop vac to remove any remaining dust or debris.
- Wipe the floor with a damp cloth to remove any remaining dust or debris.
Subsection 2: Applying New Flooring
After sanding the floor, it’s time to apply new flooring. Here are the steps to follow:
- Measure the floor to determine how much new flooring you’ll need.
- Choose the type of flooring you want to install, such as hardwood, tile, or vinyl.
- Follow the manufacturer’s instructions to install the new flooring. Be sure to use the appropriate adhesive or nails, depending on the type of flooring you choose.
- Allow the new flooring to set according to the manufacturer’s instructions before walking on it or moving furniture back into the room.
With these simple steps, you’ll have a smooth, level floor with new flooring that looks great and lasts for years to come.


